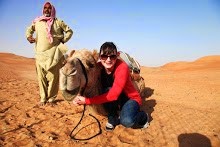
The photobooth was a huge success! We used streamers and tissue paper flowers (made by our awesome parents!)
 |
| Photobooth!!! |


The props were super awesome and free!!! I printed them from Oh Happy Day http://ohhappyday.com/2011/05/photobooth-props-diy-and-free-printable-2/ They were super easy to make. All you need is a glue gun, dowels, and card stock. You can print them on any kind of paper, but card stock is much sturdier. I bought the dowels at Micheal's Craft store. I was able to cut one dowel down to three pieces.

The cupcakes came out perfect! I went to the local bakery and explained what I wanted and they definitely delivered! They even sprinkled some edible glitter on the cupcakes (difficult to see in this photo). These were a huge hit with the kiddos!

To continue with the theme, I made some sign posts to place around the multipurpose room. I went to Home Depot and bought four garden stakes (I'm not sure what they are called...but you use them to secure newly planted trees in the ground) and I had some plywood at home in which I cut into four squares (for the base of the sign post).


I LOVE LOVE LOVE how the yarn chandeliers turned out! I was a brave and decided to attempt this as a class project. I gathered my 34 5th graders and we made our way to the balcony/patio and went to work. It was a beautiful mess! Of course that made it even more fun for my students. I posted the directions below the photo. Keep in mind that you will have glue all over you when this project is finished!
 |
| Student Made Yarn Chandelier |
1. Blow up your balloons (various sizes).
2. Attach a yarn string to your balloon (this will be needed to hang it to dry).
3. Before you start, lay the tarp down and bring out a clothes rack or something that you can hang the balloons to dry from.
4. First coat your balloons with vaseline. This will prevent the yarn from sticking to the balloons when you pop them.
5. Next mix 1/2 cup cornstarch with 1/4 cup warm water and add about half of a container of glue in a bowl. You may want to purchase inexpensive bowls because I ended up tossing them when we were done with the project. You will also need to make this mixture a few times depending upon how many balloons you make. This mixture makes about 3 medium sized balloons.
6. Dip your yarn in the glue mixture and make sure to squeeze some of the excess out. Start by wrapping the yarn vertically around the balloon and then wrap it around the remainder of the balloon horizontally.
7. Once you finish the balloon, hang it from the clothing rack to dry. It will take about 24 hours to dry. Once the yarn is completely dry you can pop the balloons and you will be left with a yarn chandelier.
The room we were using for the dance was huge and we had a lot of wall to cover. So, I decided to make a few posters using the design from the Dr. Seuss book Oh, the Places You'll Go. I think they turned out pretty nifty! My wooden floor and husband think otherwise. I ended up getting paint all over myself, the pooches, and the floor.

We blew up more than 140 balloons for this event! We did use some helium balloons, but those were mostly used on the rooftop outside (this is where the culmination ceremony took place). We attached the balloons to the doorways, the stage (photo below), the wall, and then a bunch were strewn out on the floor (the students thought that was the best).
 |
| Balloons and streamers everywhere! |
 |
| Tissue flowers and buckets as vases |
 |
| Giant Tissue Paper Poms and Yarn Chandeliers |
 |
| In the midst of setting up |
 |
| Such a huge room to decorate!!! Still setting things up. |
I thought it would be a neat idea to also give each student a candy bar award. I found a PDF file online for these amazing and colorful awards created by Reagan over at Tunstall's Teaching Tidbits, http://tunstalltimes.blogspot.com/2012/04/candy-awards.html.


The culmination ceremony was run by the students. Different students came up to the podium to welcome the families, introduce student speakers who wrote essays, introduce the teachers to hand out achievement awards, etc. One thing that the parents were very appreciative of was that we had students also translate what was just said in Spanish. Most of our parents speak Spanish and this was a wonderful way for them to feel included in the ceremony.
I also made invitations using the Dr. Seuss pattern from the book (example below) in Photoshop. Since the actual invitations contain addresses and so forth I am unable to post a photo on here.

Wowsa! This was such a long post!! I must say the planning, making, and setting up the ceremony and dance was a lot of hardwork! I had many late nights at work as well as at home. I'm so thankful for my colleagues who helped out and the parents who volunteered the day of to help with the set up and tear down of the event. Seeing the happiness and joy on my students faces made all the hard work worth it! I mean, they were practically tearing down the door to get into the dance!!
~Chelsea :)


We held our first ever fifth grade dance this year. We weren't too sure how it would go and wondered if it would be both our first and LAST annual dance. Much to our delight, it was FABULOUS! Can't wait to plan next year's! I love your theme! We might have to 'borrow' that for next year!
ReplyDeleteWe were thinking the same thing with our dance. We definitely have some dancers, but we weren't sure if they would get out there and dance. Boy did they dance! Yes! You should use the Dr. Seuss theme. It was a lot of fun decorating for. I can't wait to see what you have planned!
DeleteGooday everyone, I am Mrs courage a well known GRADE (AA) LONDON CLOTHES BALES business woman with two kids.i have any kind of bales you demand for children, adults clothes shoes hand bags etc contact on +2348100170396 for your patronage thanks
ReplyDelete